

Let me preface this post, by saying I have done absolutely no research at all into working with fabric and clamshells. I feel I need to be forthcoming about that. The technique I'm describing is something that worked for me with a bit of trial and error. I encourage you to experiment as well. Sometimes, I find it inspiring to breakaway from traditional methods and develop my own techniques.
I decided for the Down Under Doll Quilt Swap that I wanted to do something with paper pieced clamshells. For some reason, I got it in my head that they were a great way to display Liberty fabric. Armed with some clamshell templates, a Sewline glue pen, thread, needle and scissors; I set off on a voyage without much of a plan.
 The first thing I did was pull the clamshells out the package and had a play.
 I had a brief moment of frustration when I realized they don't actually fit together perfectly. I headed to Google and realized this is the norm. It varies by paper-piecing company, but generally there will be 1/8" to 1/4" overlap when you lay out the clamshells in a traditional arrangement. The folded template is part of my experimentation.
I quickly decided the traditional arrangement was a bit too... ummm... traditional for me, so I decided to give them a shuffled and see what else I could come up with. I was digging this one with the missing circle, but thought it might be a bit big for a doll quilt.
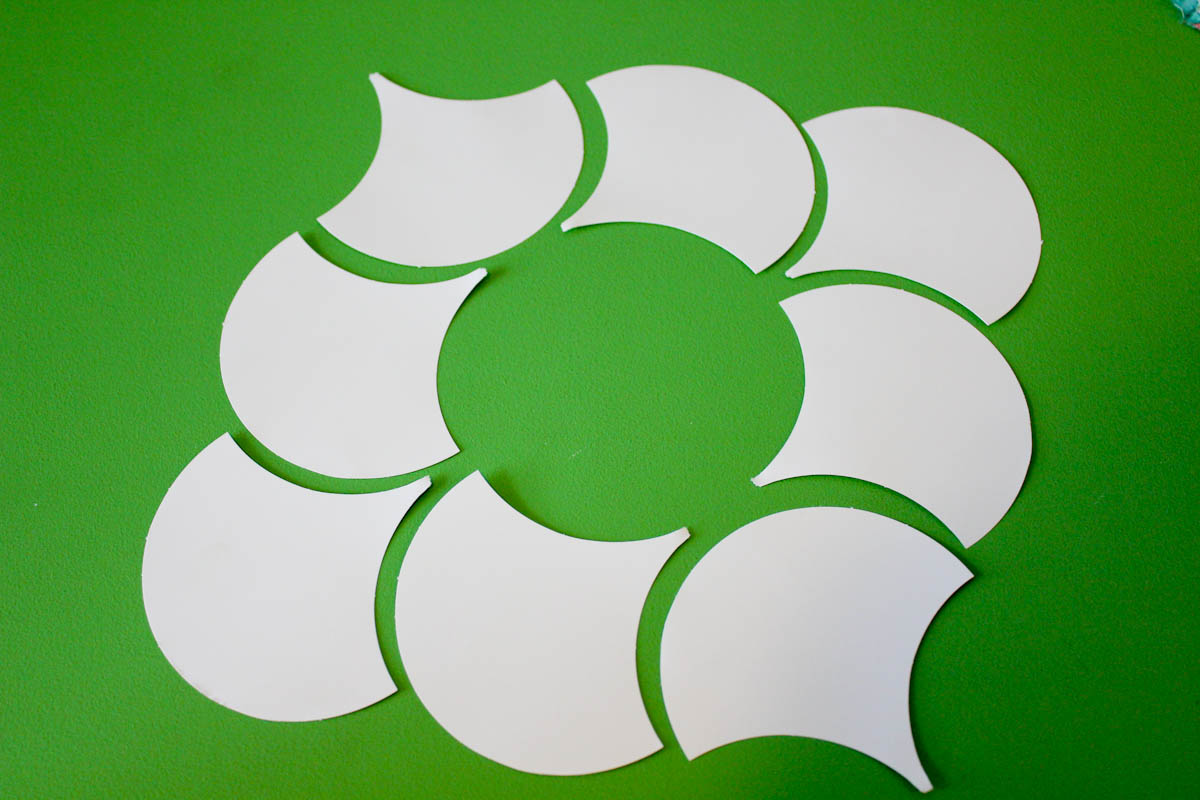

Microsoft logo anyone?

Eventually I stumbled on this bauble shape. It reminded me of Christmas ornaments and I was feeling festive. I decided this was what I wanted to work from, but knew I might play more with it once the baubles were made.

As I mentioned before, clamshells aren't meant to fit together perfectly, so some overlap is expected. I played with two options for my baubles. The first had the templates overlapping. The second spaced things out, but had a small gap where the points met. Both seemed to fit together ok with other pieces, but I had a better fit with the gap with my templates. I'd encourage you to experiment with the clamshell templates you buy to see what works best with the brand you try.
bauble with overlap

bauble without overlap note the gap at the tails. this is important later
 I had never used a Sewline glue pen before working at Calico & Ivy. Sarah recommended it when I was piecing some hexagons for a wall-hanging. I was skeptical at first, but am now a fan.
 The Sewline Pen is a special glue stick that can be used on fabric and washes away. Is it any different than a normal blue glue stick? I don't know but I wasn't going to risk my Liberty fabric on it. It doesn't cost much more and it's easy to hold with it's nice pen shape. It also makes it easy to remove the paper templates when you are ready.
Instead of hand basting all of my hexagons, I opted to baste them with glue to the paper piecing templates.

Before cutting things out, I put a small amount of glue in the center of one template and attached to the back side of my fabric (the dull faded side). Because I knew I needed a little extra tail fabric to fill in the gaps of my bauble, I left myself an extra inch or so at the bottom of the template.
 Next, I used my scissors to trim 1/4" around the clamshell. This is much easier to do, if your clamshell template is lightly glued to the fabric in the center.
 Notice the extra fabric at the tail.
The next step is to baste the seam allowance to the clamshell template with glue. Run a small amount of glue over the top arc of the fabric about 1/8" in from the edge. Only do the top edge for now. Tip: don't glue all the way to the edge, this will make it harder to sew later.
 Beginning in the center of your clamshell, fold the seam allowance over and attached it to the clamshell template. You want it taut, but not stretched. Remember that you need to put a needle through the fabric. If you pull the seam allowance too tight, you won't be able to sew it later.
 Continue around the arc gluing the edges down. Because of the shape of the curve, you'll need to fold the fabric a bit. Spread the bulk of the excess fabric around the curve evenly and make sure everything looks smooth from the front. You could also notch the fabric, if you like, but I found it unnecessary with lightweight Liberty. I would definitely notch bulky fabrics like heavy linens.
Next we need to clip into the lower curves so we can baste them. Make about 5 small snips around each side. Do not cut too close to the edge. In the next few photos, the snips will be more apparent.

Using your glue pen, baste the bottom curves. You can see how the snips allow the fabric to lie flat on the template. Try to make sure your corners are tidy. For now, just fold the tails across and do not worry about gluing them.

 Repeat for your other clamshells. I've folded the tails out of the way for this photo.
 Do a test again to see how things fit together. You may need to juggle and overlap your clamshells slightly depending on how your templates are shaped. I've folded the tails back out of the way so you can see the gap that I will fill in when I hand sew.
 Much better, no gap.
 Beginning at the outside edge of your templates, hand sew using either a whip stitch or ladder stitch as you prefer. (Described in my hexagon tutorial) I feel in this case, the ladder stitch works best because it allowed me to see what I was doing and to slowly pull your clamshells together for the best fit.


Continue this way until you get to the center of the clamshell. Then repeat for the other pieces. I find working from the outside in ensures the best fit.

When you are ready to attach the clamshells to the fabric, give them a light press. This will ensure the seams are flat. After you've sewn down a clamshell, you can remove it's paper template by cutting a small hole in your backing fabric or you can leave a small gap on your last clamshell to remove the template.
And that's the basic technique! In the end, I decided on a series of rotated baubles instead of interlocking ones. I was pretty happy with what I came up with and I hope my partner will like.

I know there's a general feeling in modern quilting that clamshells are old school, stuffy and dull. I'm happy to say there's quite a few ways to spice them up. Have you worked with pieced clamshells at all? Do you know of a killer modern quilt made with them? Grab yourself a pack of templates and a gluepen, then give them a try!
PS: My husband ensures me that Feeling Clammy is a terrible name for a tutorial... hmm. there ya go.
PPS: I was also pointed to the Curlique Crush quilt after posting my pictures, which is a machine pieced quilt with similar shapes. I'm partial to my handpiecing method because the curves of the clamshells mirror the organic shapes of the baubles. I also think that there was something intrinsicly special about handpiecing this for my partner. I think they will appreciate that little detail. By all means though, if you want to get these shapes quickly, do check out Curlique Crush.
happy crafting.
Fun. I think the modern quilt world thinks too many things are old, stuffy, and traditional...forgetting that practically every one of us is just doing our own take on a traditional concept or design. This is neat, I'm sure youll have lots of people reconsidering this.
ReplyDeleteAs usual, your photos and tutorial are stunning Amy!! Loving the green backdrop board with the white papers.
ReplyDeleteIt's perfect and I may send students to your page when I'm teaching the English paper piecing module if that's ok? We only cover hexagons in class. x L
I really admire your 'have a crack' approach!
ReplyDeleteLove the finished quilt x
I'm with you...hand piecing always makes a quilt more special! I absolutely love your finished quilt!
ReplyDeleteNice one! I've been thinking of doing a Curlicue Crush quilt, but now I think I'll go for this method instead- I like the way the pieces form curved seam lines within the shape.
ReplyDeletethat looks fantastic. i'm doing some research on the sewline pen & found your thoughts on it helpful. thank you!
ReplyDeleteСпасибо за урок. Замечательно!!!
ReplyDeleteI love this method as I am about to embark on a large clamshell quilt made of Liberty fabric as a gift for my mum's 70th. I do have one question though - when you stitched the clamshells together did you stitch through the paper template? As I can't imagine it would then be easy to remove the paper template if glued and stitched? Did they come out easily? Many thanks!
ReplyDelete